Exposure Composite
One frame from a bracket — shadows and highlights together
Hand-held brackets, repeated scans of one negative — dynamic range that a single frame cannot hold can be captured across several and merged. Select 2–9 photos of the same scene at different exposures in Browse mode and choose Exposure Composite: NegRGB aligns them, merges around the best-exposed reference frame, and saves a new positive photo with greater dynamic range, with an optional HDR result that keeps highlights beyond standard white.
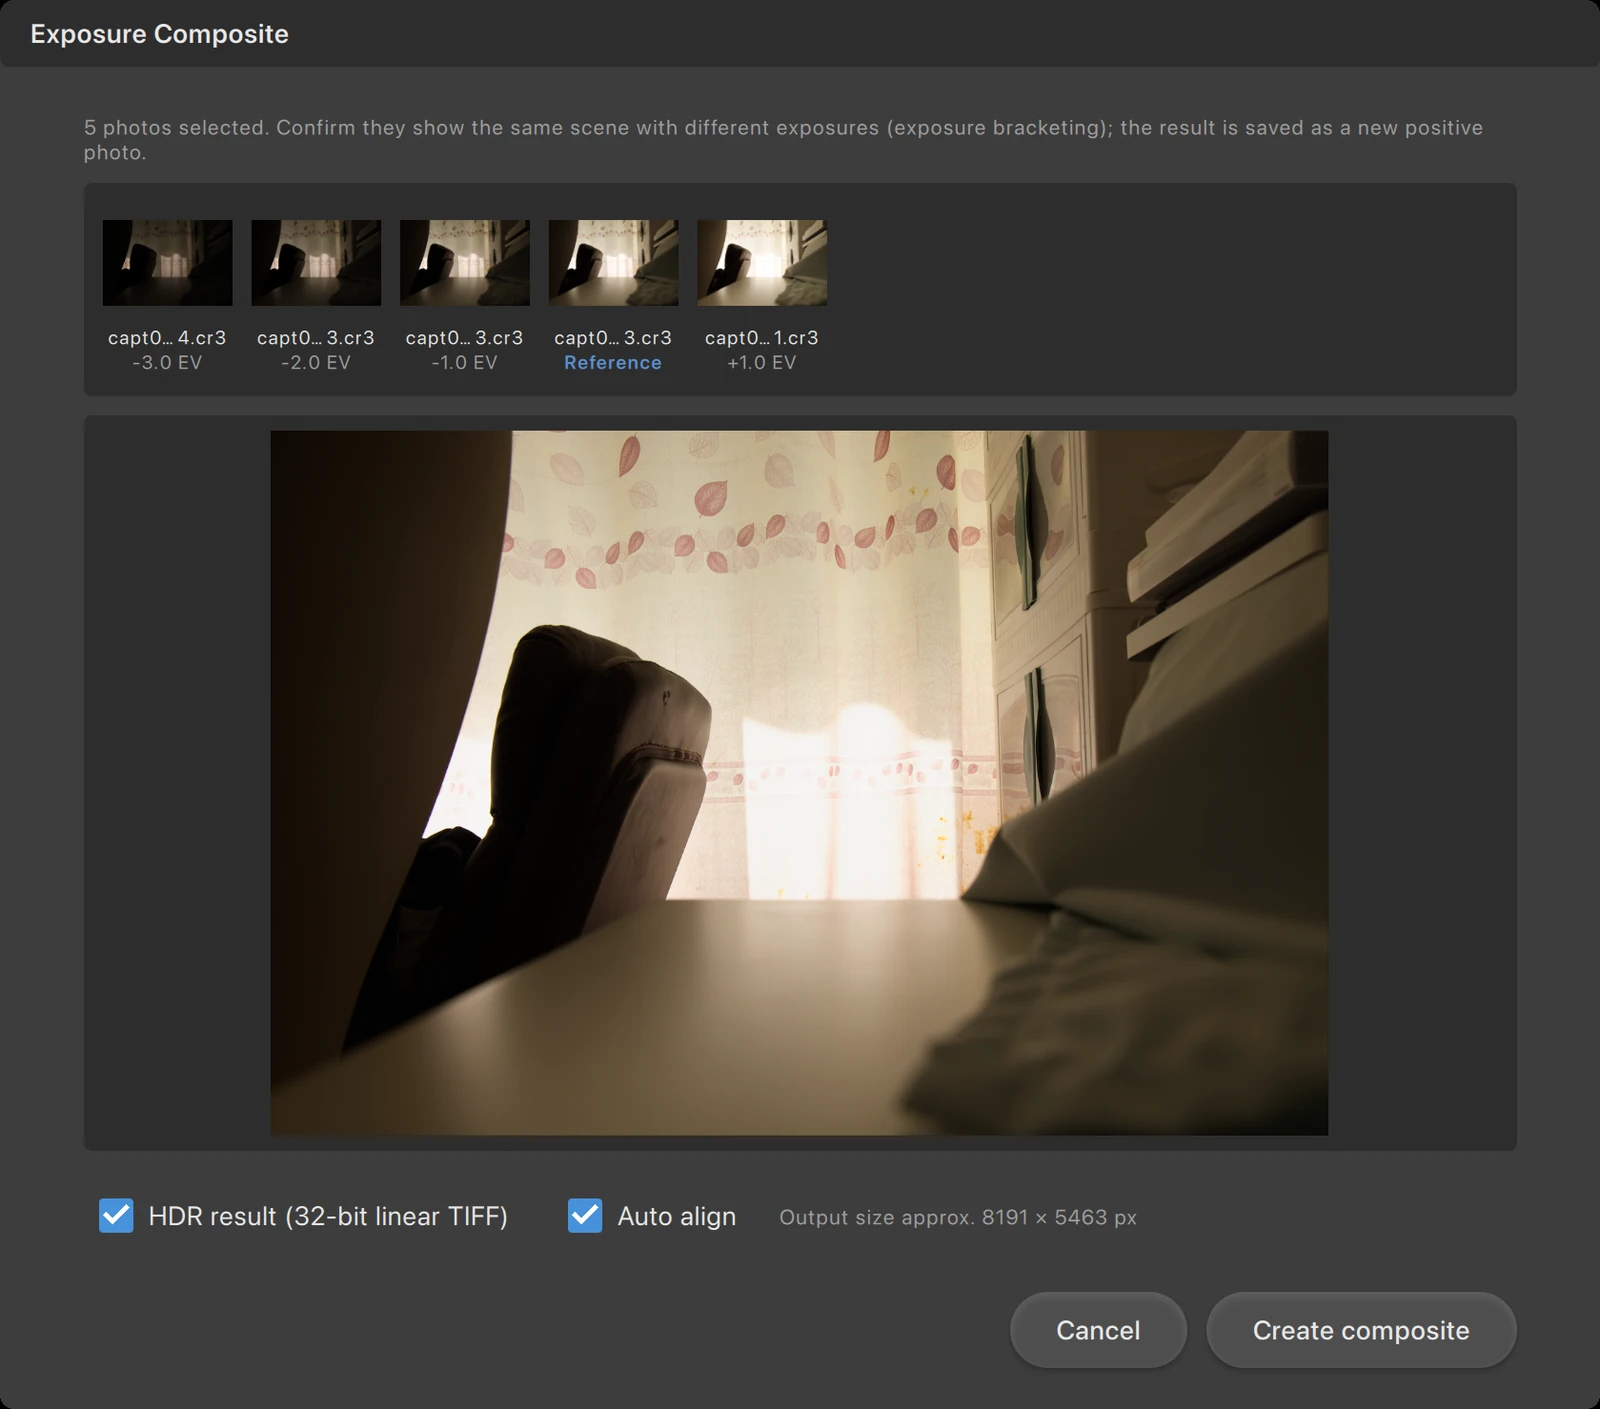
Highlights
- —Select 2–9 frames of the same scene at different exposures in Browse mode, right-click and merge
- —The filmstrip shows each frame’s relative exposure (EV), one of them marked as the reference
- —Auto align estimates translation and slight rotation between frames, then crops to the common valid area
- —The reference is the brightest frame with minimal clipping, keeping shadow detail; the preview updates live
- —Optional HDR result (32-bit linear TIFF) keeps highlights beyond the SDR white point
- —Without HDR, a 16-bit linear TIFF is saved with a soft highlight shoulder to avoid hard clipping
- —The result is imported next to its sources as a positive photo, ready for every other tool
Why merge several exposures
Film and sensors both have finite dynamic range: expose to the right and shadows are clean but highlights clip; protect the highlights and the shadows sink into noise. A bracket captures the same scene at several exposures, each holding a different usable brightness range; exposure composite merges those ranges — highlights from the frames that are not clipped, shadows from the frames with a full exposure — into a result more complete than any single frame. No tripod required: auto align is on by default and estimates the shift and slight rotation between frames before cropping to the shared area.
- —Repeated scans of the same negative at different exposures can be merged the same way
- —Use frames of the same scene at different exposures — do not mix different viewpoints or scenes
- —Auto align is on by default; turn it off when the sources are already aligned to avoid unnecessary cropping
The reference frame sets the anchor
The filmstrip at the top lists every source frame with its relative exposure (EV), and one is marked as the reference — the brightest frame whose clipped area stays under about 2% (exposing to the right preserves shadow detail), falling back to the least-clipped, near-mid-gray frame when every frame clips. The composite is anchored to the reference frame’s exposure and framing and takes well-exposed, unclipped regions first; the preview updates live in the center and the estimated output size is shown below.
- —EV labels make the exposure relationship of every frame obvious
- —The result is anchored to the reference frame’s framing and exposure
- —The dialog stays open while rendering and closes once the new photo is imported
HDR result and output
Tick "HDR result (32-bit linear TIFF)" to keep highlight range beyond the standard SDR white point for later HDR viewing or processing; leave it unticked to save a 16-bit linear TIFF after a soft per-channel shoulder that avoids hard clipping of highlight channels. The preview always shows a standard SDR rendition. When the merge finishes, the new photo is written into the current film next to its sources and selected — it is a positive, so it is not inverted again on reopen, and white balance, curves, masks and every other tool work as usual.
- —HDR result: 32-bit linear TIFF with highlight headroom; otherwise 16-bit linear TIFF
- —The result is imported into the current film as a positive, ready to edit
- —Crop, perspective, masks and lens correction do not apply to the inputs (alignment needs the full frame), while flat field does