Flat Field Correction
Make the light fall evenly on every frame
Uneven illumination, carrier and body vignetting, sensor shading at the edges — lighting-path errors like these follow every frame into post. Flat field correction starts from one blank reference scan (no film, light through the carrier, or a uniformly lit white target) to build a correction profile, then applies its gain to the photo: brightness and color unevenness are removed in one step, so inversion and grading start from a clean, trustworthy base.
Highlights
- —One blank reference scan builds a profile that cancels uneven lighting, carrier vignetting and edge falloff
- —Supports a single reference image or three independent R / G / B references
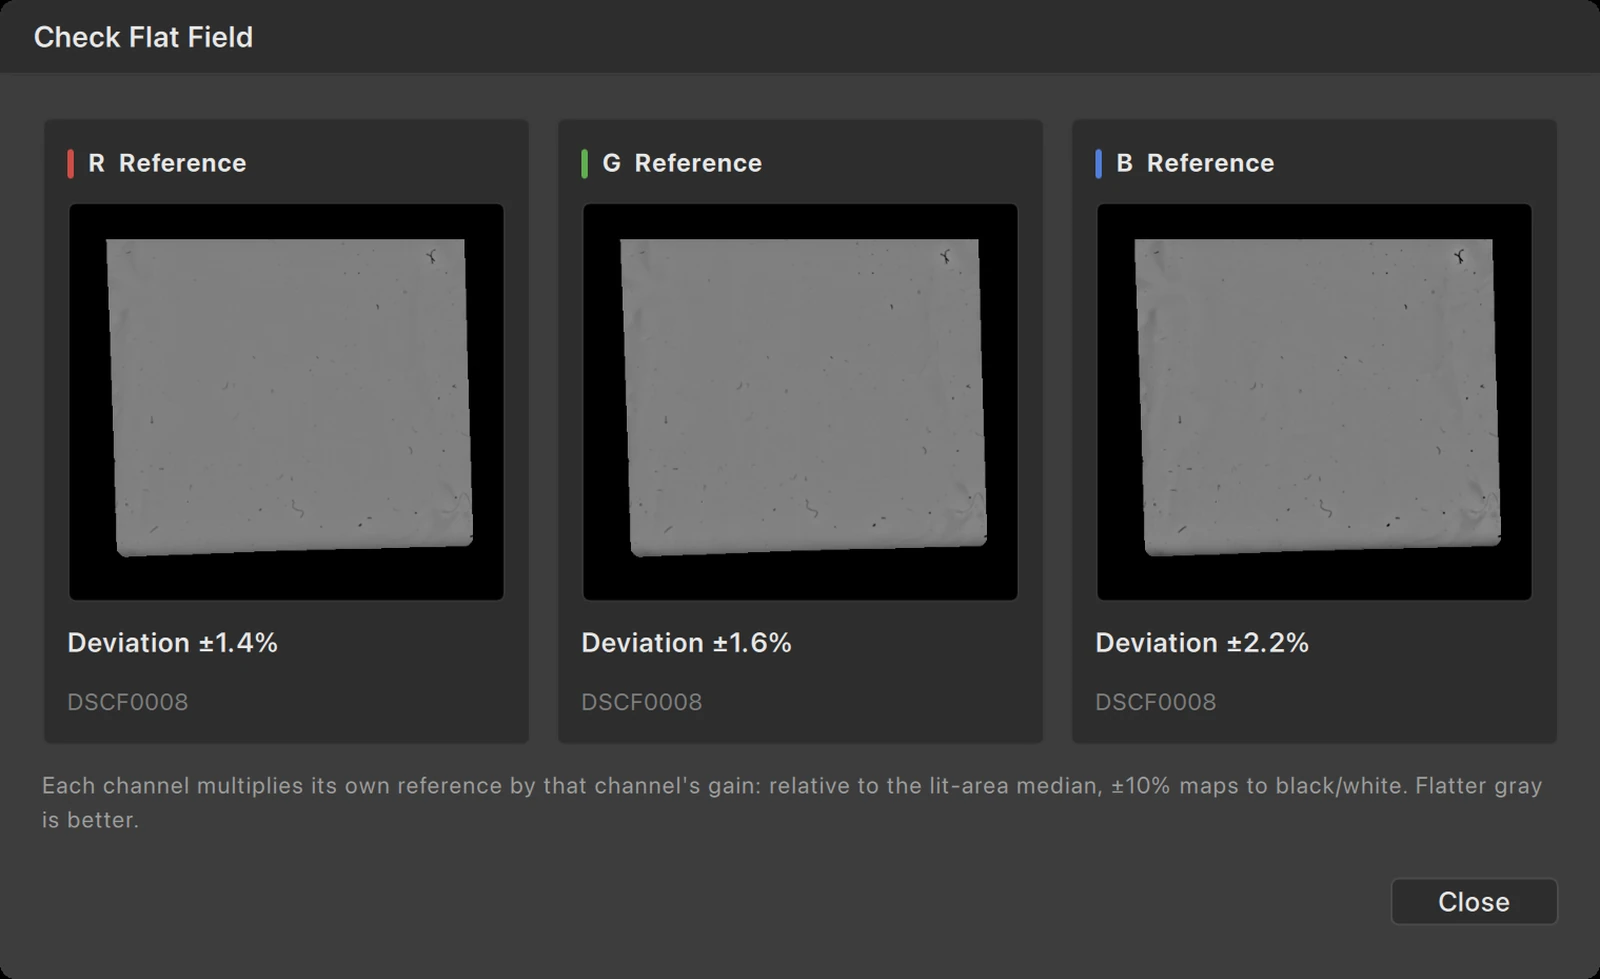
- —The Check dialog shows each channel’s corrected view and deviation, and flags clipping or low uniformity
- —A clear reading: relative to the lit-area median, ±10% maps to black/white, so neutral gray means even
- —Works for negatives and positives; every photo keeps its own on/off state and chosen profile
- —Pairs with exposure composite, focus stacking, panorama stitching and channel composite — each input is corrected by its own settings
- —Apply a profile to a whole film roll, or carry it with parameter copy/paste and presets; undo any time
Why flat field correction
A scanner’s light source, a copy stand’s light box, the shading edge of a film carrier, lens and sensor vignetting — all of these make the center brighter than the edges, or leave one color channel less even than the others. That unevenness belongs to the light path and appears on every frame; pushing curves afterwards cannot cure it, because the center-to-edge brightness difference and the channel gradients turn into color casts once the negative is inverted. Flat field correction measures that unevenness first, then removes it precisely.
- —Reference: a blank scan with no film (light through the carrier), or a uniformly lit white target
- —Use the same light path, light source and scan/capture settings as the target photos
- —Do not clip the reference, and keep dust, carrier edges and hot spots out of it
Build a profile with the right references
Open the Flat Field card in the General parameter panel and press + to create a profile: name it and pick the reference mode — a single reference image (an RGB image supplies its R / G / B channels, a single-channel image is the common reference for all three), or "multiple references (R / G / B)" when the channels were shot at different exposures, where each image is used only for its own channel. The profile is saved, selected and applied to the current photo right away; if the reference is clipped or not uniform enough, a warning suggests lowering the light and reshooting, or checking the reference for carrier edges, dust and hot spots.
- —Profiles are shared app-wide across all films and photos, and can be switched in the dropdown
- —Each photo stores its own on/off state and profile; undoable, and it travels with parameter copy/paste and presets
- —Deleting a profile removes correction from every photo that referenced it
Check it, then use it with confidence
Press Check to open the check dialog: the R / G / B columns show each channel’s corrected reference view with its deviation percentage — measured against the lit-area median with ±10% mapped to black/white, so the closer to neutral gray, the flatter the light path. Clipping or low uniformity is flagged, and channels without their own reference are called out. Once it looks good, Apply to All Photos in This Film applies the current profile and switch state to the whole roll; flat field correction works on the source image (before crop and perspective), so everything downstream starts from the corrected frame.
- —Three channel views plus deviation numbers tell you at a glance whether the reference is usable
- —Clipping / low uniformity is flagged so a bad reference never corrects a whole batch
- —Applied before crop and perspective; composite and stitch inputs use their own settings, and new outputs start with it off