Tethered Capture
Shoot straight into your film roll
Connect a digital camera over USB and NegRGB doubles as your viewfinder and shutter release: watch Live View on the computer, focus remotely and trigger shots from the window — each capture transfers automatically into the current film, with no card swapping in between. Captures are imported as positives, ready to edit immediately.
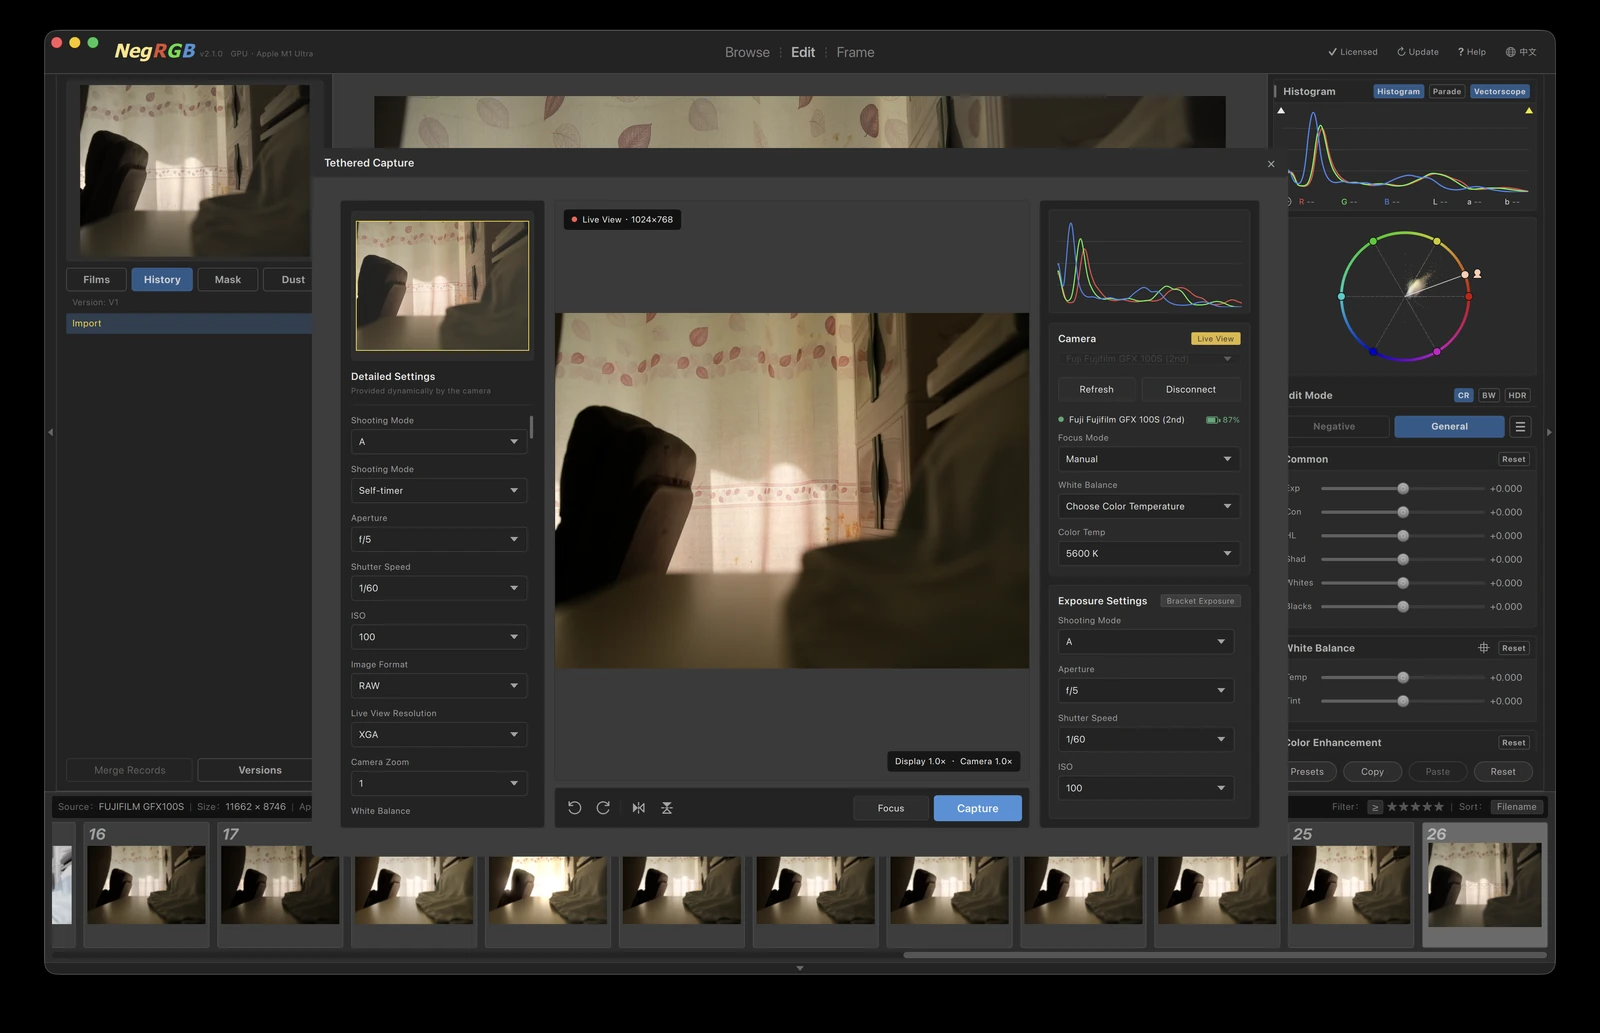
Highlights
- —Open from the camera icon in Edit mode or with Cmd / Ctrl + Shift + T — a standalone window that leaves the main window usable
- —Live View: the mouse wheel zooms around the pointer, and drag to pan when magnified
- —On supported cameras, click the image to set the focus point, then press Focus for a single autofocus pass
- —Remote capture: the photo is imported into the selected film, appended and selected automatically
- —Camera settings stay in sync: shooting mode, aperture, shutter speed, ISO, white balance and color temperature, image format, battery
- —Bracketing: 0–5 frames, forward / backward / both directions, 0.5 / 1 / 2 / 3 EV steps, shot as one sequence
- —Rotate and mirror apply to Live View and to every following capture, so an upside-down copy setup still comes in right side up
Live View for composition and focus
Once the camera is connected, the Live View image keeps updating on the computer, so composition, white balance and exposure are easy to judge. The mouse wheel zooms around the pointer, and once magnified you can hold and drag to pan through detail; the navigator on the left marks both the on-screen view and the camera side zoom area. For precise focus, click the image on a supported camera to place the focus point and the camera zooms there; press Focus for a single autofocus pass, then Capture to shoot.
- —Live View resolution and image format follow the camera and can be changed in the window
- —Changes the camera does not allow appear read-only, so nothing is altered by accident
- —Closing the window stops Live View but keeps the camera connected; reopening resumes it
From the camera into the film roll
Pick the destination film in the film repository on the left, then press Capture: the camera takes the shot and transfers it, and when the transfer finishes the photo is imported into that film, appended at the end and selected so you can start editing right away. Captures are imported as positives and are not inverted like a negative scan; RAW files render with the camera settings recorded at capture time, matching the Live View look. The rotate and mirror buttons apply to both Live View and every following capture — flip an upside-down copy stand back in the window and the frame arrives the right way up, while photos already on the card are untouched.
- —Settings are locked while a capture transfers, so nothing changes mid-shot
- —The imported photo is selected automatically, ready to edit
- —With no film selected, the Capture tooltip asks you to choose a destination first
Settings, bracketing and status
The Camera card gathers device selection, connection state, the Live View toggle, focus mode, white balance and color temperature shortcuts, and battery level; the Exposure Settings card lists the most-used shooting settings. When a single exposure is not enough, open Bracketing to set the frame count, direction and step, press Capture once and the camera shoots the whole sequence, importing every frame into the current film. Connection state and errors (such as the camera being used by another app) are reported right in the card.
- —White balance and color temperature adjusted in the window and applied to the shot
- —Bracketing count 0–5; with both directions the camera shoots both ways, giving count × 2 − 1 frames
- —Battery level sits next to the camera model and changes color when low